Built a Dockerfile
When I first started to learn about Docker, I literally had no idea what was happening until I start.Eventho it was wrong or basic atleast we haev a little experiences to it, Eventually it get better. So, it’s best to start with something.
Before getting started, I just came to know that before creating a Dockerfile, there’s an option to create the image layers using docker container commit and view it with docker image history. This is just another way to Build an Image
Alright, let’s get started. The first few things we need to know are:
- A Dockerfile is used to create a container image.
- It provides instructions to the image builder.
Example:
FROM python:3.12
WORKDIR /usr/local/app

# Install the application dependencies
COPY requirements.txt ./
RUN pip install --no-cache-dir -r requirements.txt

# Copy in the source code
COPY src ./src
EXPOSE 5000

# Setup an app user so the container doesn't run as the root user
RUN useradd app
USER app

CMD ["uvicorn", "app.main:app", "--host", "0.0.0.0", "--port", "8080"]
The above instructions will produce a ready-to-run Python application.
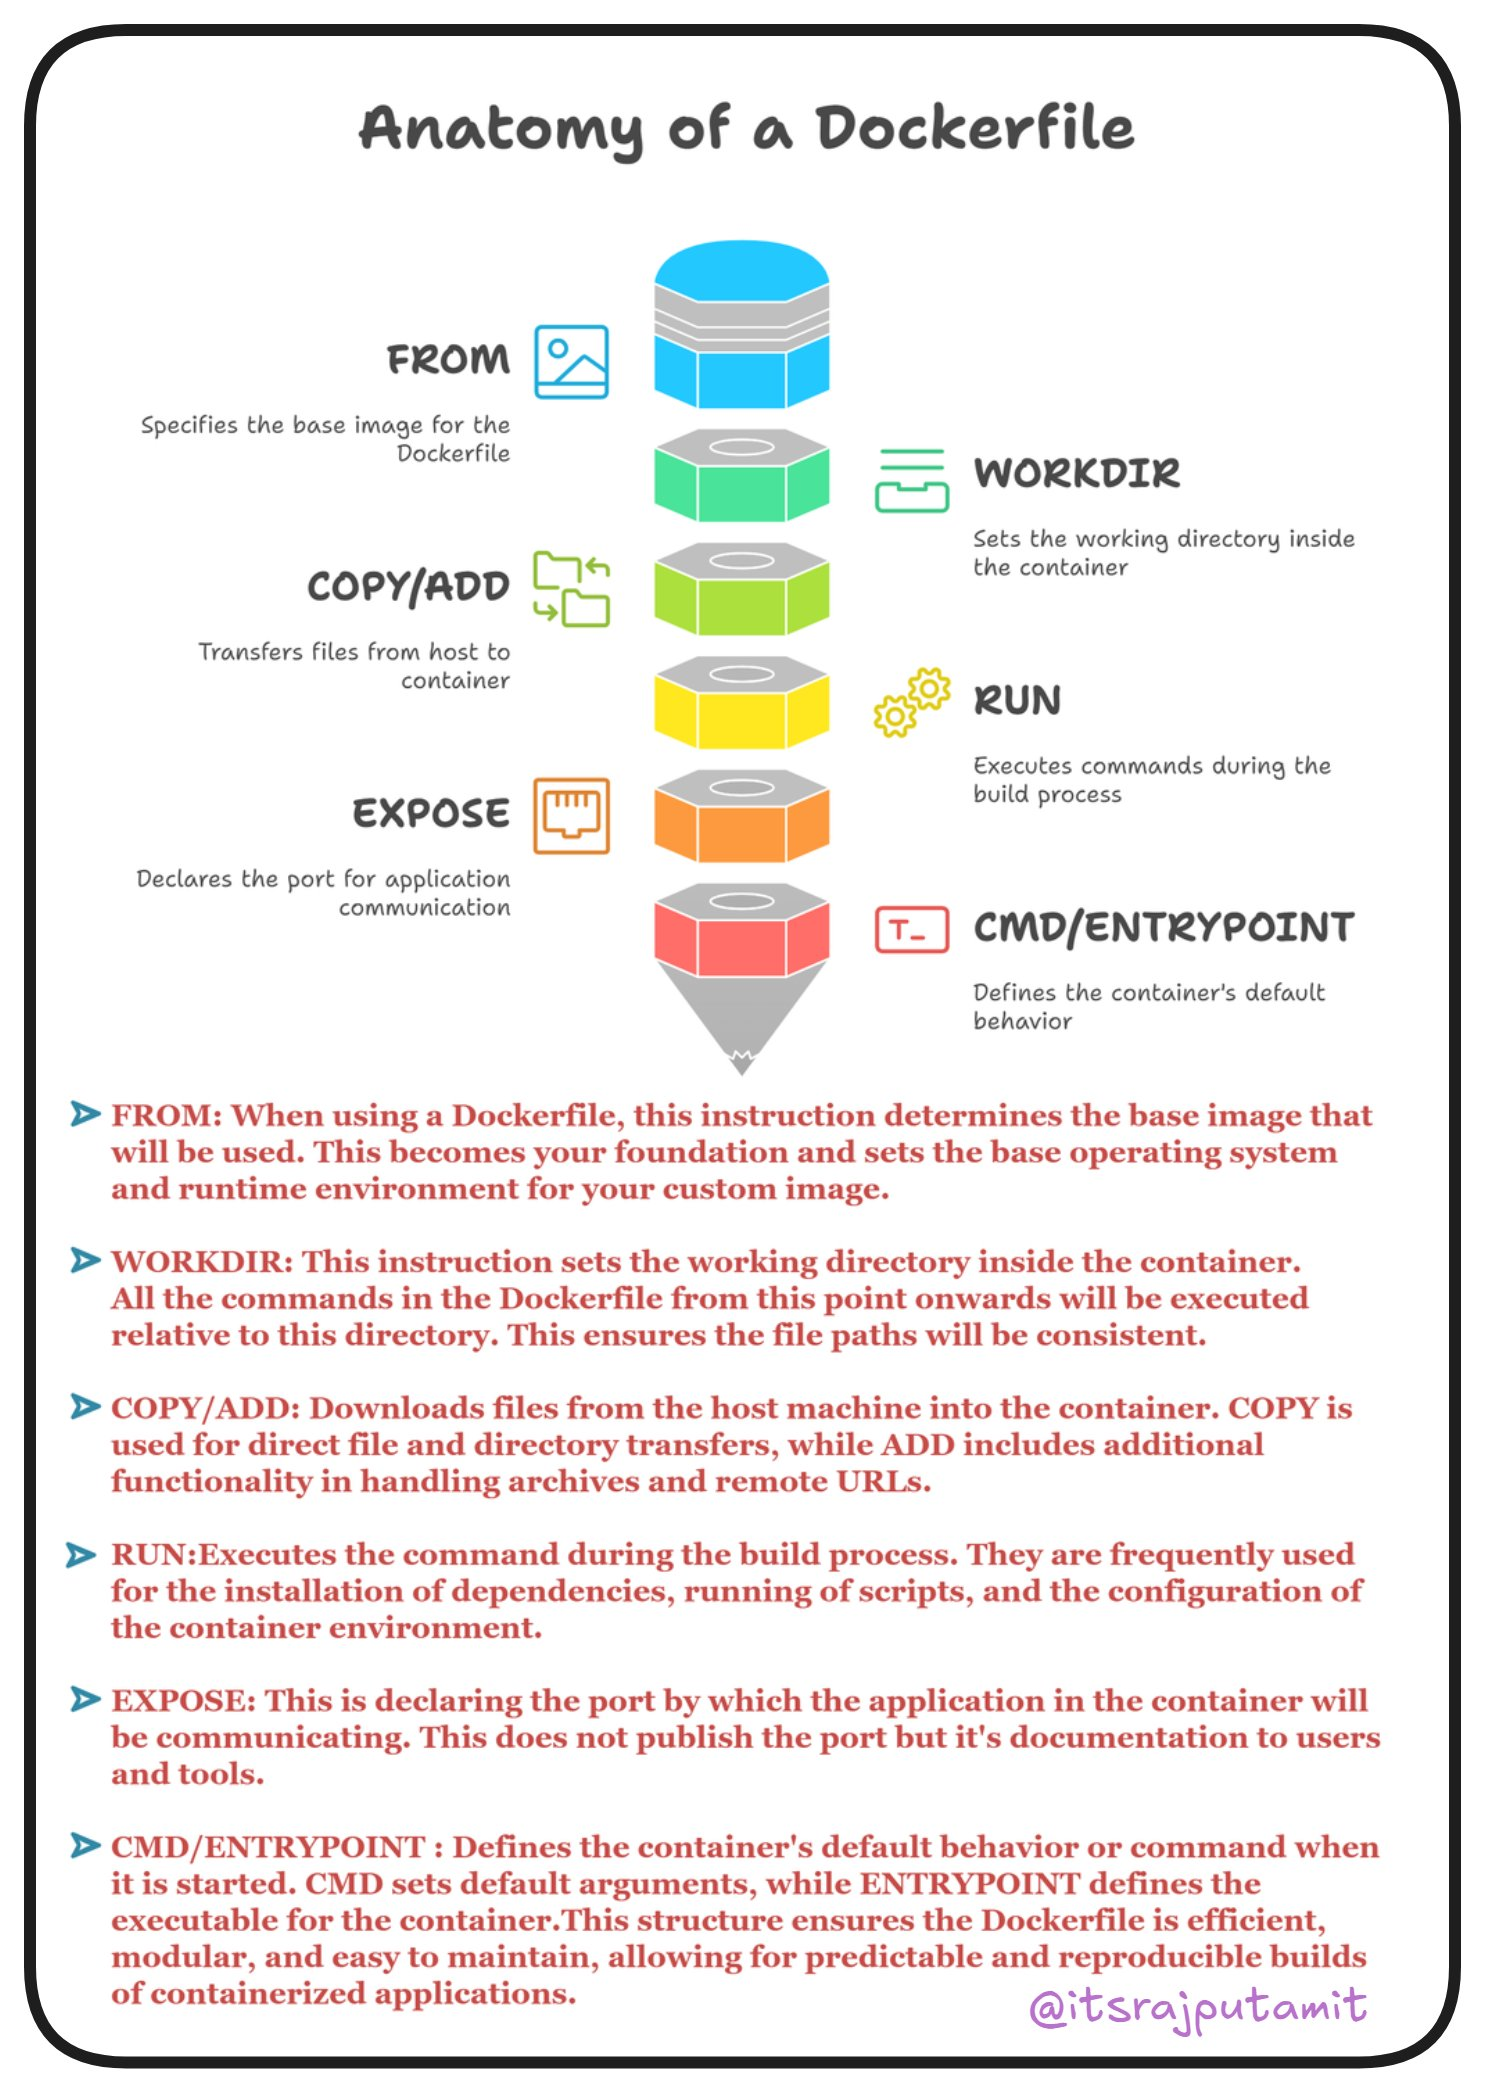
As we can see, it consists of a few sections like FROM, WORKDIR, COPY/ADD, RUN, EXPOSE, CMD/ENTRYPOINT. Each of these has its own usage, as mentioned in the image. These are the common instructions in a Dockerfile:
Common Instructions
Some of the most common instructions in a Dockerfile include:
FROM <image>: Specifies the base image that the build will extend.WORKDIR <path>: Specifies the “working directory” or the path in the image where files will be copied and commands will be executed.COPY <host-path> <image-path>: Tells the builder to copy files from the host and put them into the container image.RUN <command>: Tells the builder to run the specified command.ENV <name> <value>: Sets an environment variable that a running container will use.EXPOSE <port-number>: Sets configuration on the image that indicates a port the image would like to expose.USER <user-or-uid>: Sets the default user for all subsequent instructions.CMD ["<command>", "<arg1>"]: Sets the default command a container using this image will run.
I just learned that in an existing repository, you can create a Dockerfile by initializing docker init. It will analyze the project and quickly create a Dockerfile, a compose.yml, and other necessary files. Read More.
Dockerfile Reference, which provides every single instruction and description for each command. Even though it’s not necessary to use every one of them, it’s good to know and understand. It might be helpful in the future.
Okay, I’m trying to understand what each of these actually does and what’s the best way to initialize it. One thing I know and understand is that Multi-stage Builds are one of the best practices for creating an image. Let’s learn about that too.